Gleap can import help center articles, past conversations and contacts from other tools or from CSV files, and export your contacts again as CSV. Which importers you can use depends on where you're coming from. If you're still planning the move, start with Switch to Gleap from another tool.
Open Help center in the sidebar.
Click Importer and choose Import from Intercom, Import from HelpScout or Import from Freshdesk.
Paste an API key or access token that you create in your old tool. Freshdesk also asks for your Freshdesk domain. Intercom asks which regional endpoint your workspace uses: US (api.intercom.io), EU (api.eu.intercom.io) or Australia (api.au.intercom.io).
Start the import and let it run.
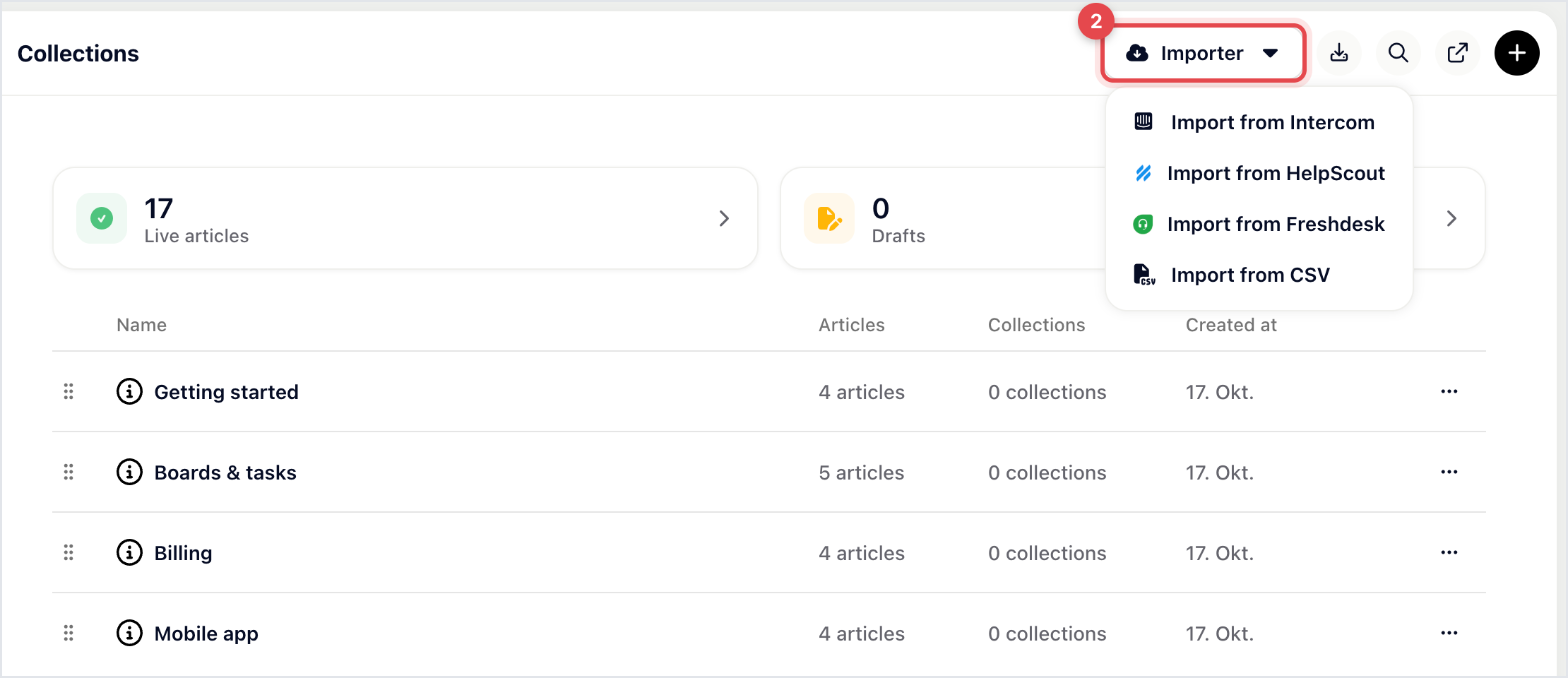
Collections and articles keep their structure, so you land with the same shape you had before. The help center importers use the key for this import only and don't store it.

In Help center, click Importer and choose Import from CSV.
Upload a file with a title and the HTML content of each article, plus a Collection ID and a Collection Title that place it.
Check the mapping before you confirm.
Optional columns are a description, a collection description, a parent collection ID, a collection icon URL, a creation date and a draft status. Without a draft status, articles are published as they come in.
The Collection ID decides where an article lands. Articles that share an ID end up in the same collection, and Gleap creates the collection if it doesn't exist yet. The first row with a given ID sets that collection's title and description, so keep them the same on every row. Correcting a bad import means deleting and re-running it.
Open a ticket board, for example your inbox.
Open the board's ⋯ menu and choose Data import.
Pick the source: Intercom, HubSpot, Zendesk, Freshdesk or a CSV file, and follow its steps.
Conversations come with their contacts. Zendesk also brings organizations over as companies, and the HubSpot import leaves attachments out. Help Scout has no conversation importer.
Large imports run in the background, so you can close the tab. If an import is interrupted and you start it again, conversations that are already in Gleap are recognised and not duplicated.
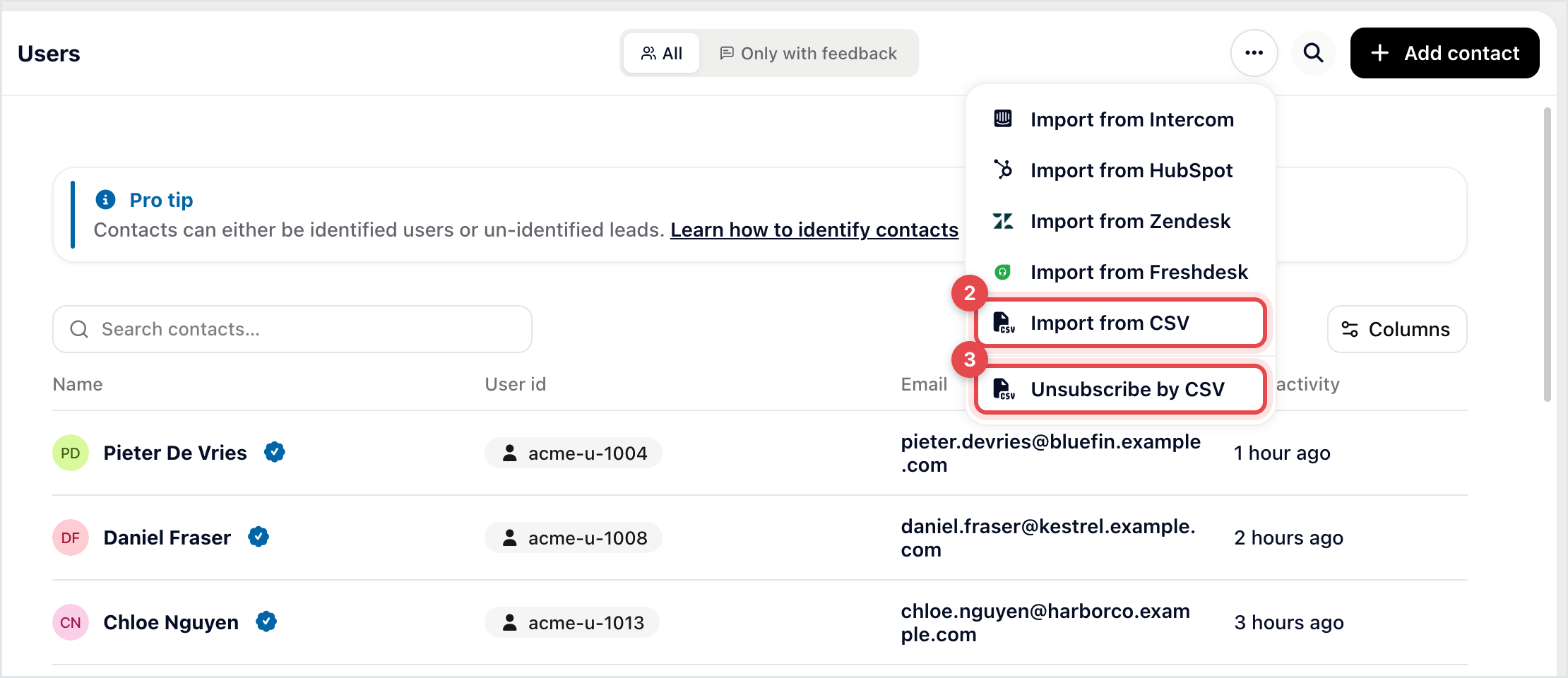
Open Contacts in the sidebar.
Click ⋯ (More actions) and choose Import from CSV, or Import from Intercom, HubSpot, Zendesk or Freshdesk.
For a tool, enter its API credentials. Zendesk also wants your subdomain and the email of the account the token belongs to.
For a CSV file, upload it and map each column to a Gleap field. Columns named like a field are mapped for you, and any contact attribute you've defined can be a target. Columns you don't map are ignored.
The tool importers are a one-off migration step, not a sync. To add a single person, such as someone who phoned, click Add contact instead.
Each row is matched against your existing contacts before anything is created, so running the same file twice doesn't duplicate anyone.
A row with a user ID is matched on that ID, and updates that contact. Use the same ID your product sends to Gleap.identify, so the imported row and the live contact stay one person. To bulk-update attributes, include user IDs.
A row with only an email address is matched on the address, ignoring upper-case letters in your file. It only fills in fields the contact doesn't have yet and never overwrites existing values.
A row with neither becomes a new contact every time.
Dates need a format Gleap recognises. A sign-up date that arrives as text can't be filtered on, so open one imported contact and check. Try a handful of rows first: it's easier to check ten contacts than to unpick ten thousand.
An import brings people across, not their email preferences. If you're migrating, upload your old opt-out list before you send anything: in Contacts, click ⋯ and choose Unsubscribe by CSV. Emailing people who opted out at your previous provider is the fastest way to turn a migration into a complaint.
Only admins can export contacts.
Go to Settings → Project → Data export.
In the Contacts card, choose the Audience: All contacts, Users, Guests, Unsubscribed, Bounced or one of your custom lists. Set a date range in the header if you need one.
In the Download row, click Export as CSV.
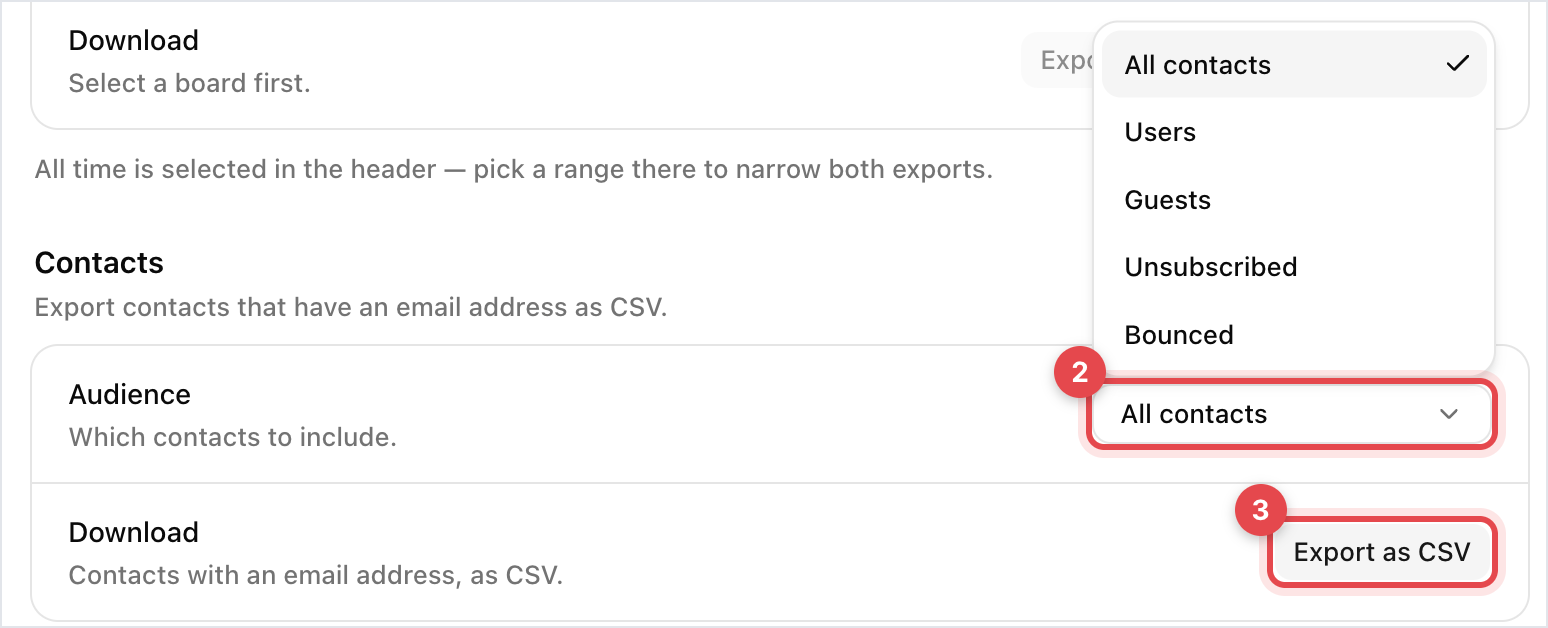
You get a CSV of the contacts that have an email address. To export one person, for example for a data request, open their contact page, click ⋯ and choose Export contact data.
An export is a file of personal data on someone's computer, outside everything Gleap does to protect it. Export only what you need, and delete the file when you're done.