The messenger is the widget customers open on your website or in your app. Its settings are now organised around four tasks under Settings → Widget: Install, Look, Content and Conversations. AI chatbar has its own row alongside them.
Open Settings → Widget → Look.
Under Version, choose the widget version.
Set the logo and colours under Brand.
Choose the Header style and its supported options.
Configure the Launcher position and appearance.
Check the preview and wait for changes to save.
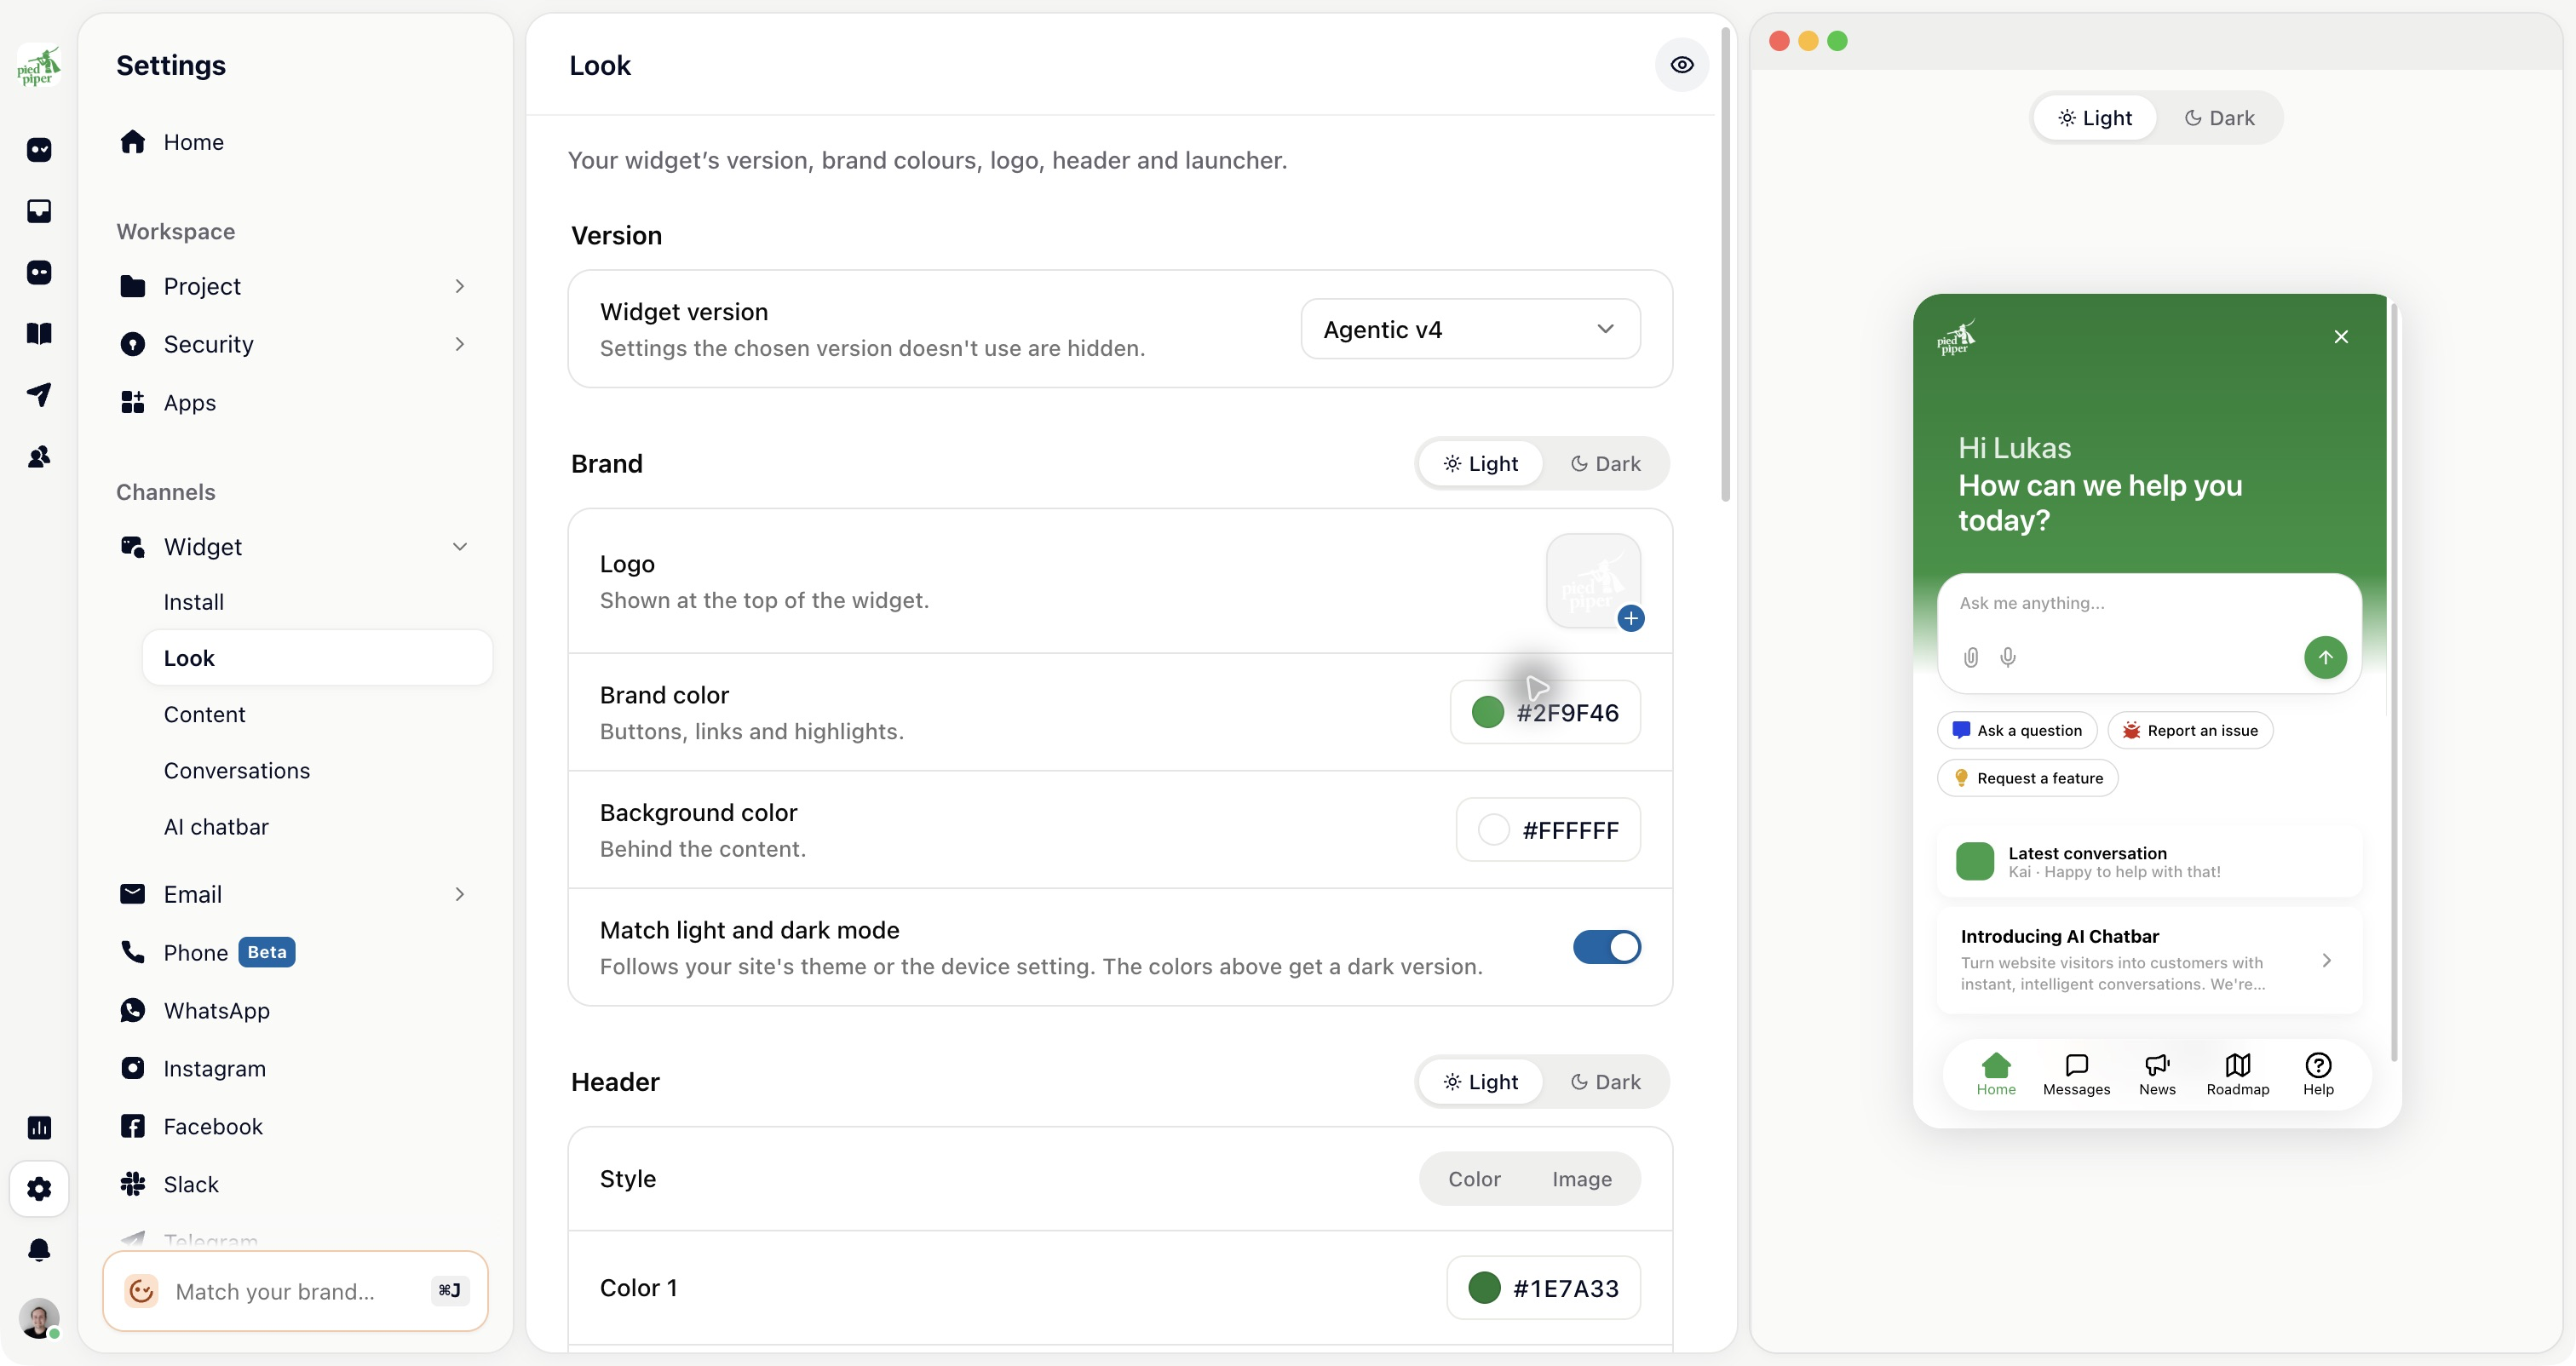
Look settings save automatically. They do not wait for a page-level Save button.
Classic uses the traditional home with listed actions and descriptions. Agentic centres the home on a question box and quick actions. Agentic v4 adds the newer agentic presentation and composer glow; some older header effects are not available in that version.
Check the preview after switching versions. A home question still needs an answering workflow or the configured support path; changing the visual version does not by itself enable AI answers.
Under Brand, turn on Match light and dark mode. Use the Light and Dark controls to edit each palette. Generate from light mode provides a starting point for dark colours.
See Turn on dark mode for the messenger.
Open Content for the greeting, quick actions, home cards, announcement and tabs. Tabs → Open on chooses the initial tab; only enabled tabs are normally offered.
The Messages tab and conversation screen are configured under Conversations. That page also holds reply expectations and form-related options.
Look contains the Gleap-branding control where your plan allows it. Advanced → Shape, size and custom CSS holds the finer appearance settings.
Custom CSS depends on widget markup that can change. Check your actual product as well as the preview when using it.